How to organize products in a hardware store
How to organize products in a hardware store
If you run a hardware store, you already know how disorder feels: a customer asks for a half-inch elbow, the assistant searches for fifteen minutes among unlabeled boxes, and in the end the customer leaves and buys from the competition. Hardware stores handle thousands of small items, from a single screw to a five-gallon bucket of paint, and when there is no method to organize them, the business loses sales, buys products it already has, and never knows exactly how much stock remains. The good news is that getting organized does not require a new warehouse or a large investment: it requires a simple system of families, codes and locations, plus the discipline to keep it running. In this guide we show you, step by step, how to organize the products in a hardware store so that you, your team and your customers find everything in seconds.
Why organization pays off in a hardware store
Organizing your inventory is not a matter of looks: it is a decision that shows up in your numbers. When every product has a defined place, the salesperson stops walking back and forth and serves customers faster, which means more customers served per hour. Organization also helps you spot what needs to be reordered before it runs out, avoids buying duplicates because nobody knows what is in the back room, and reduces losses from expired, rusty or damaged products forgotten at the back of a shelf. An organized hardware store also builds trust: customers can tell that the people there know what they sell. In short, order improves sales, lowers costs and makes the whole business more agile.
Step 1. Group your products into families
Before thinking about codes or shelves, you must define how your products are classified. The most practical approach in a hardware store is to group them into families by how they are used. These are the most common families:
- Fasteners: screws, nuts, washers, bolts, anchors and wall plugs.
- Tools: hand tools (hammers, screwdrivers, wrenches) and power tools (drills, grinders).
- Paint and finishes: paints, enamels, thinner, brushes, rollers and sandpaper.
- Plumbing: pipes, elbows, fittings, stop valves, faucets and sealants.
- Electrical: wire, switches, outlets, electrical tape and light fixtures.
- Building and masonry: cement, adhesives, stucco, nails and wire mesh.
- Locks and general hardware: padlocks, chains, door locks and hinges.
You can create as many families as you need, and if a group grows too large, split it into subgroups. For example, within fasteners you can separate wood screws, sheet-metal screws and concrete screws. What matters is that the classification is clear for the whole team, because the next steps depend on it.
Step 2. Create a unique code for each item
Once your families are defined, give each product a unique reference or code. A good code reads like a sentence: it tells you the family, the type of product and its size. The idea is that anyone, just by looking at the code, knows which product it is without opening the box. A simple scheme combines letters for the family and numbers for the size:
| Family | Type | Size | Code | Physical location |
|---|---|---|---|---|
| FAS (fasteners) | Wood screw | 2 inches | FAS-WS-02 | Aisle 1 – Shelf 2 – Box B |
| PLU (plumbing) | PVC elbow | 1/2 inch | PLU-EL-050 | Aisle 3 – Shelf 1 – Box A |
| ELE (electrical) | Outlet | Double polarized | ELE-OU-DP | Aisle 2 – Shelf 4 – Box C |
| TOO (tools) | Claw hammer | 24 ounces | TOO-CH-24 | Aisle 4 – Shelf 3 – Box A |
| PAI (paints) | Synthetic enamel | 1 gallon | PAI-EN-1G | Aisle 5 – Shelf 2 – Box B |
Record each code in a master list with the trade name, brand, size, sales unit and location. That way, when a supplier offers you a volume discount, you can immediately check how many units you have of that item and decide with data instead of relying on memory.
Step 3. Define a physical location for each product
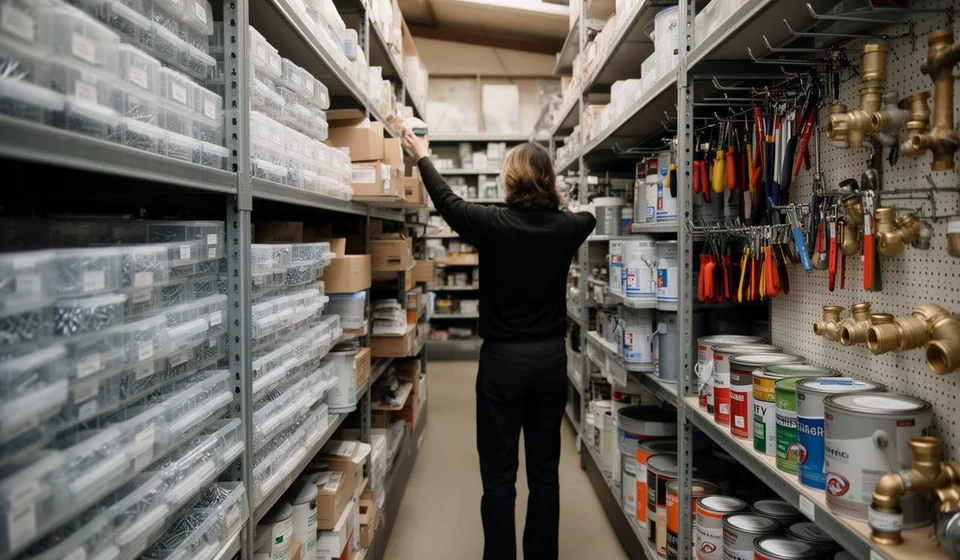
The code tells you what the product is; the location tells you where it lives. In the warehouse or the store, organize the space by aisles, shelves and boxes, and write that address on the product record. For example, the address "Aisle 2 – Shelf 4 – Box C" means the product is in aisle 2, on shelf 4, inside box C. This way of locating items is especially useful for fasteners and small accessories, which are usually stored in organizer boxes. Place your fastest-moving products near the counter and at eye level, while bulky or slow-moving items go on the top shelves or at the back of the warehouse.
Step 4. Label everything: shelf and product
Defining locations is useless if nobody can read them. Label each aisle, each shelf and each box with its address, and mark the products or their packages with the matching code. Use legible labels that resist moisture and dust, two constant problems in a hardware store. Take a moment to check that every label matches its contents: a box labeled "1-inch screws" that actually holds bolts creates the same chaos as having no labels at all. Reserve an area for "items pending classification" so newly received products are not put away by eye, breaking the system.
Step 5. Control sizes, brands and pack sizes
In a hardware store, the difference between two items is often tiny: a screw changes by a quarter of an inch and a paint changes by its shade. That is why, when organizing, you should always separate by size, brand and pack size, even if it seems excessive. Follow this order when receiving merchandise:
- Check the merchandise against the invoice and verify quantities and sizes.
- Assign or confirm the code for each new item.
- Record the receipt in your inventory system before putting the goods on the shelf.
- Store the product in its location and fix the label if needed.
If you sell the same screw by the unit and also by the bag or box, define separate pack sizes with their own codes; otherwise your counts will never match.
Step 6. Keep the order in your daily routine
An organized inventory falls into chaos within weeks if there are no clear rules. Set simple routines: restock the shelves first thing in the morning, return every tool to its place after using it, label right away the products opened for retail sale, and do a ten-minute visual walkthrough at closing time. Assign each employee responsibility for one zone and rotate those zones from time to time so the whole team learns the warehouse. Small daily adjustments prevent the exhausting full-day reorganizing sessions nobody wants to do.
Let the physical order show in the system: Kardex Tauro
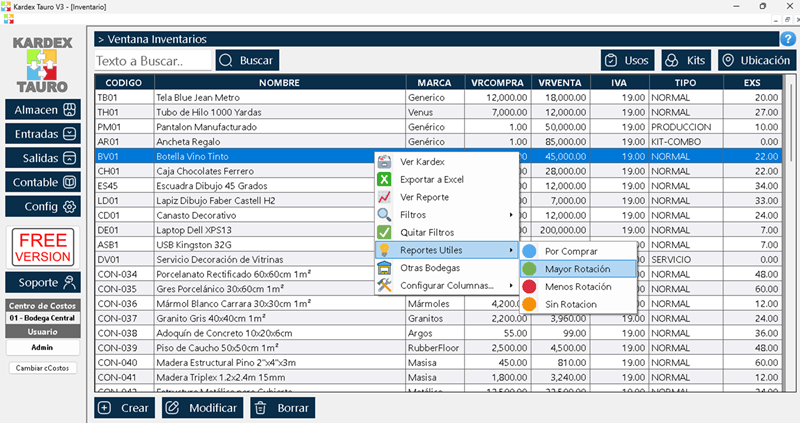
The order on the shelves only pays off if the information is up to date in the software. This is where Kardex Tauro, the inventory program for small businesses made in Colombia, becomes your best ally: whatever you organize physically, you replicate in the system using the same codes. In Kardex Tauro you can create each product with its complete information and its code, so the reference on the label is the same one in the program. You can also organize your products into Groups and subgroups that mirror the families in your warehouse, and record on each product record the Warehouse Location (for example, aisle, shelf and box) so any employee knows exactly where to find the item. If you already keep your inventory in a spreadsheet, you can import the initial inventory from Excel and skip the work of typing every product one by one. And when you need to know how many units are left of an item, checking stock takes seconds, not an afternoon of counting. That way, the code on the box always matches the code on the screen.
Organizing a hardware store is not a weekend project: it is a method built step by step and maintained with routines. Group by families, code every item, define clear locations, label everything and record every movement in your inventory system. If you want the physical order and the digital record to work together, try Kardex Tauro: designed for businesses like yours, with up to 50 employees, it helps you always know what you have, where it is and how much you need to buy. Your warehouse, your customers and your accountant will thank you.
