Inventory closing kit in Excel: counting, reconciliation and adjustments

Inventory closing kit in Excel: counting, reconciliation and adjustments
Closing inventory sounds like a one-day job: count what you have, compare it with what the records say and leave everything in order. In practice, closing time is when every oversight of the period becomes visible. The system says there are 50 units of a product, and when someone counts the shelf, only 47 are there. Nobody remembers when the three units were lost, and if that shortage is not documented it will come back in the next closing, mix with other differences and end up distorting the real value of the business.
Inventory closing is a process, not a single event. To be reliable it needs four ordered moments: plan what will be counted and when, count physically, reconcile what was counted against what the system records and, finally, adjust the differences with authorisation and supporting evidence. Every moment should leave a written record; otherwise the closing becomes an exercise in memory and good intentions.
This inventory closing kit brings together three Excel spreadsheets that cover the complete flow: the cycle count plan, the inventory reconciliation and the adjustments register. They are internal control tools, not official fiscal documents: they do not replace any legal or accounting requirement in your country, but they give you the administrative evidence to know what was counted, which difference appeared and how it was resolved. The three files work without a currency symbol, so they are useful with any currency and in any type of business.
Download the three templates of the kit and build the complete flow for your next closing:
⬇ Download cycle count plan (.xlsx) ⬇ Download inventory reconciliation (.xlsx) ⬇ Download inventory adjustments (.xlsx)What the kit is and how the closing flow works
Each template in the kit solves one part of the closing and the three fit together like a chain. The cycle count plan answers the question of when to count: it organises the warehouse by areas or racks, assigns each one a frequency (weekly, biweekly, monthly or quarterly), a day within the period and an owner, and lets you track the state of the cycle with options such as pending, counting, counted and reconciled. The inventory reconciliation compares, product by product, the quantity shown by the system with the quantity actually counted; it calculates the difference and its value, and asks you to classify the cause and decide the action: adjust, investigate or recount. The adjustments register documents the movements that are finally approved: in or out by adjustment, with their reason, quantity, the manager who authorises and the supporting document.
Used in order, the three templates leave a complete trail of the closing: the count is planned, carried out on the scheduled date, compared against the system and adjusted only when it has been verified and authorised. If an adjustment has no supporting document or a difference was left uninvestigated, it is obvious that the process is incomplete. Each file also includes its own instructions sheet with a worked example, so anyone on the team can use it without prior training.
Kit components
The following table summarises what each template contains and the role it plays in the closing:
| Component | What it contains | How it supports the closing |
|---|---|---|
| Cycle count plan | Areas or racks, categories, count frequency, assigned day, owner, cycle status and count dates. | Defines what is counted and when, and keeps counts spread out so operations never stop. |
| Inventory reconciliation | Code, product, unit, system qty, physical qty, difference, unit value, difference value, cause, action and notes. | Compares what was counted against the system, calculates differences per product and guides the decision: adjust, investigate or recount. |
| Inventory adjustments | Date, code, product, adjustment type, reason, quantity, value, authorised by, support document and notes. | Records only approved movements and keeps the evidence of who authorised them and with what support. |
What to do at each step of the closing
The closing flow has four steps and one of the kit tools takes part in each one. This table shows what to do and which of the three spreadsheets to use:
| Closing step | Kit tool |
|---|---|
| 1. Plan the count | Cycle count plan: choose the areas, assign frequency, day and owner. |
| 2. Count and record the result | Inventory reconciliation: enter the physical quantity counted for each product. |
| 3. Reconcile against the system | Inventory reconciliation: review the calculated difference, classify the cause and set the action. |
| 4. Adjust with authorisation | Inventory adjustments: record the approved in or out movements with their support. |
A worked numeric example
Imagine a product that the system records with 50 units. During the count of the assigned area, 47 are counted. When the result is entered into the reconciliation, the difference is calculated automatically: physical quantity minus system quantity, that is, minus 3 units. Before touching the inventory you investigate: you check whether there was an unrecorded sale, a data entry error or a real shortage. Once the shortage is confirmed and authorised by the manager, an out adjustment of 3 units is recorded. After the adjustment, the record shows 47 units, the same as the physical count.
| Moment | Quantity (units) |
|---|---|
| System quantity before the adjustment | 50 |
| Physical quantity counted | 47 |
| Difference (physical minus system) | -3 |
| Decision after investigating | Shortage confirmed: adjust |
| Movement recorded | Out adjustment of 3 units |
| Quantity after the adjustment | 47 |
In the spreadsheets, the difference and the total value are solved with formulas: the value of an adjustment is the quantity multiplied by the unit value. Because the templates use no currency symbol, you type the numbers in your local currency and the formulas keep working the same way.
Step by step to close your inventory with the kit
- Prepare the cycle count plan: list the areas or racks of the warehouse and assign each one its category and count frequency.
- Set the assigned day and the owner of each count, and spread the dates across the period so operations never stop.
- Count the products physically on the scheduled date and write down the real quantities you find.
- Bring the results into the reconciliation: for each product, enter the code, the system quantity and the physical quantity counted.
- Review the difference calculated by the template and classify the cause with the available options, such as recording error, overage or shortage.
- Set the action: adjust, investigate or recount. If the cause is not clear, investigate or count again before deciding.
- Once the difference is confirmed and authorised, record it in the adjustments register: adjustment type, reason, quantity, the manager who authorises and the supporting document.
- In your stock ledger, record the movement as an adjustment and mark the cycle as reconciled in the count plan; that way the recorded balance matches the physical one.
Tips for a clean closing
- Spread the counts across the period instead of stopping everything for one full inventory: cycle counts do not halt operations and let you spot differences as soon as they appear.
- Adjust only with support and authorisation: no employee should change stock on their own; every adjustment has a manager who authorises it and a supporting document.
- Record adjustments in your stock ledger as adjustment movements: if the spreadsheet is corrected but the stock ledger is not, the same difference will come back in the next closing.
- Reconcile every count before closing it and update the cycle status: a count left unreconciled is a difference that is not yet understood.
- Pay attention to causes that repeat: if the same product is short month after month, the problem is not the count but some step of the process, and it is worth fixing it at the source.
- Keep one row per product and do not mix concepts on the same line: a clean record reconciles itself.
When it is time to move to inventory software
The Excel kit works very well when the business fits into a few spreadsheets: a few hundred references, one warehouse and a small team. But when the volume of movements, the number of warehouses or the people recording ins and outs grow, keeping the system quantity column up to date becomes more and more fragile, because every sale, purchase, return or adjustment depends on a manual entry that must be done on time.
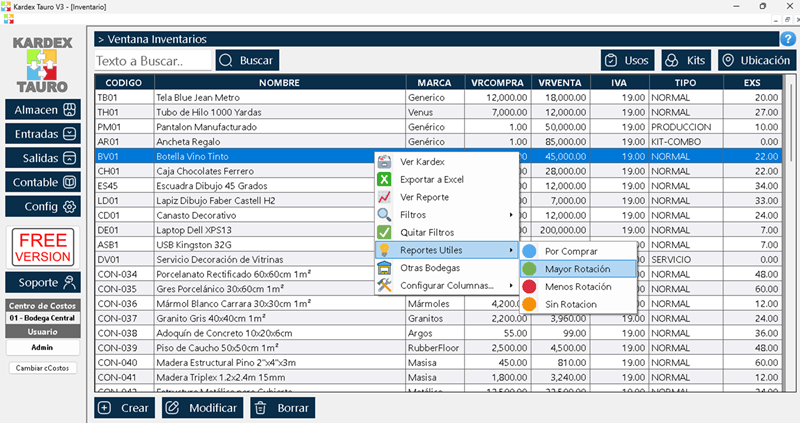
That is the point where inventory software starts to pay for itself. Kardex Tauro, for example, updates stock with every movement and keeps the traceability in the stock ledger; when a physical count detects a difference, the regularisation is recorded with its reference and its owner, without depending on spreadsheets that someone has to keep current.
The migration does not have to be radical: many businesses use the count plan and the reconciliation as field forms and transfer the final result to a system such as Kardex Tauro. The kit remains a good documentary backup for the closing, both on paper and in Excel.
Download the three templates and keep your next inventory closing documented from start to finish:
⬇ Download cycle count plan (.xlsx) ⬇ Download inventory reconciliation (.xlsx)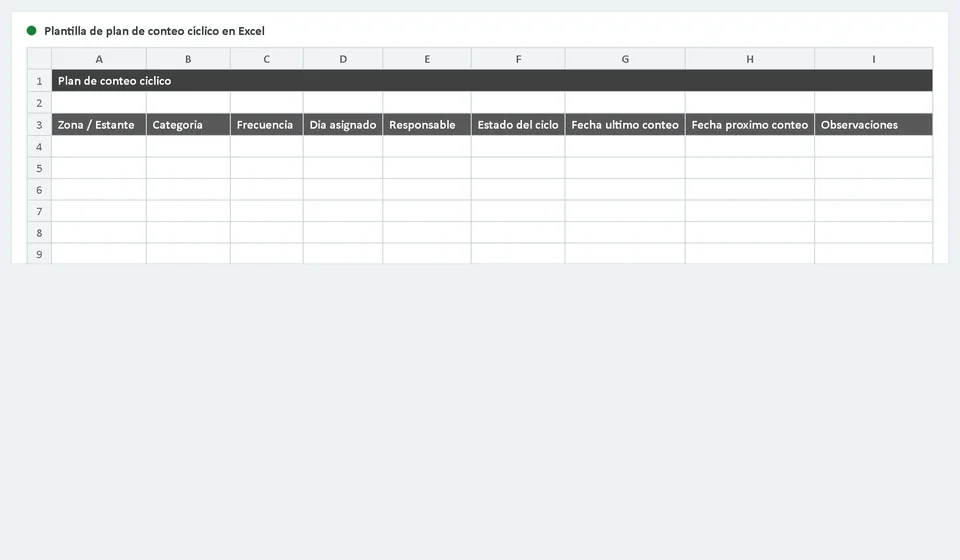
Frequently asked questions
What does the inventory close kit include?
Count, reconciliation and adjustments: the three sheets needed to close the period.
In what order are they used?
Count first, then reconciliation against the system, and finally the authorised adjustment. Changing the order leaves the adjustment unsupported.
What is documented in the adjustment?
The reason and the authorization. Without them the adjustment looks like window dressing and nobody trusts the inventory.