Expiry and batch tracking template in Excel: free download

Expiry and batch tracking template in Excel: free download
Every product with an expiry date lives with a clock that never stops. A carton of milk, a bottle of syrup, a jar of cream or a batch of cleaning supplies has a deadline, and when that day arrives without you seeing it coming, the result is always the same: shrinkage, health and legal risk, and customers who lose trust. The problem is rarely a lack of care; it is the difficulty of remembering, among dozens or hundreds of references, which batch expires first, which one is about to expire and which one should already have been removed. This expiry and batch tracking template in Excel is designed so that memory is no longer part of the equation.
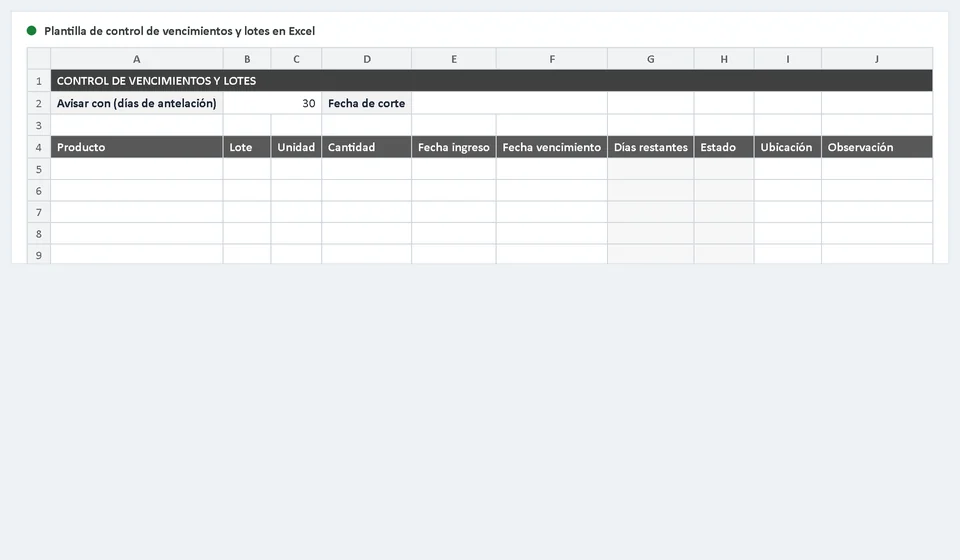
Here is how the template works: you record each batch once, on the Control sheet, with its product, quantity, entry date and expiry date, and the sheet calculates the days remaining and the status of every batch on its own. A small panel at the top lets you choose how many days in advance you want the register to warn you (thirty days by default), and an automatic cutoff date keeps the calculations up to date every time you open the file. The download also includes an Instructions sheet that explains every column and every color, so you can start using it on day one without help.
With this control you can answer in seconds what expires this week, what must leave your shelf first, which batch has to be pulled and documented, and which products need FEFO rotation (first expired, first out). It works for food, beverages, medicines, cosmetics, cleaning supplies and any item with a shelf life, whether you run a small store or a business with several warehouses.
⬇ Download expiry and batch tracking template (Excel .xlsx)What the template includes
The downloadable file contains two sheets. The Control sheet is where you work: it has room to record up to two hundred rows of batches, with filters enabled in the headers so you can sort by product, status, location or expiry date. The Instructions sheet walks you through the data entry step by step and reminds you of the basic rules of rotation and of removing expired stock.
| Field | What it does in the control |
|---|---|
| Product | Identifies the item the batch belongs to, for example plain yogurt in 1 L containers. |
| Batch | The code printed on the packaging or on the supplier invoice; it is the key to traceability. |
| Unit | The measure you use to count the product: unit, box, bag, bottle, kilogram or liter. |
| Quantity | The units available of that batch; it accepts decimals, for example 12.5 kg when you buy bulk ingredients. |
| Entry date | The day the batch arrived in your inventory. |
| Expiry date | The deadline printed on the packaging; it is the date that rules the whole control. |
| Days remaining | Calculated automatically: expiry date minus the date of the day, which is the automatic cutoff date. |
| Status | Calculated automatically: Active, Expiring soon or Expired, depending on the days remaining and the notice you set. |
| Location | Where the batch physically is: shelf, cooler, cold room, gondola or warehouse area. |
| Notes | Comments such as removal, return, quantity adjustment or an agreement with the supplier. |
Above the table, on the same Control sheet, are the two configuration cells: the “notify (days in advance)” cell, which you can change at any time and which comes set to thirty days by default, and the automatic cutoff date, which shows the day the sheet uses for its calculations and refreshes on its own with your device date. If you ever need more space, just copy the formulas in the last two columns downward and the new rows are ready to use. The filters let you see, for example, only the batches expiring soon or only the ones in the cold room.
How the automatic status works
The Days remaining column does one single operation: it subtracts the date of the day, which is the automatic cutoff date and which Excel updates with your device date every time you open the file, from the expiry date of each batch. If a batch expires in one month and you open the file today, the column shows around thirty days; if you open it again a week later, it shows twenty-three. The calculation is always fresh and never depends on someone updating a formula.
The Status column compares those remaining days with the “notify (days in advance)” cell and assigns one of three labels:
- Active: more days remain than the notice margin. The product can be sold or used normally and is placed following FEFO rotation, with the earliest expiring batches within easy reach.
- Expiring soon: days remain, but equal to or fewer than the notice margin. This is the signal to speed up the exit: move it to the front, offer it first or use it before batches with more shelf life.
- Expired: the expiry date has already passed. The batch must be removed from the sales or use area, separated and documented; it must not be sold or used.
Changing the margin is very easy: if your products move fast and you want the alert as soon as fifteen days remain, type fifteen in the cell and every status recalculates instantly. If you handle medicines or delicate food, a margin of sixty or ninety days gives you more time to react. That is why the cell is editable and not locked in the file.
The automatic status is the engine of FEFO rotation: first expired, first out. The idea is that the batch with the closest date is also the first one to go to the customer or to internal use, so no product ages on the shelf while newer batches are sold. With the Status column always visible and the filters sorting by expiry date, any member of the team can apply FEFO without calculating anything by hand.
Example with numbers
To show you what the control looks like in practice, here are four batches recorded in the sheet. The values in the Days remaining column are the ones the formula would show when the file was reviewed on the day this example was prepared; because the cutoff date is automatic, those numbers change by themselves every time you open the file. The notice margin used in the example is thirty days.
| Product | Batch | Entry date | Expiry date | Days remaining | Status |
|---|---|---|---|---|---|
| Plain yogurt 1 L | L240512 | 01/03/2026 | 02/05/2026 | -129 | Expired |
| Whole milk 1 L | L260715 | 12/06/2026 | 20/09/2026 | 12 | Expiring soon |
| Sparkling water 600 mL | L260904 | 20/06/2026 | 15/10/2026 | 37 | Active |
| Orange juice 1 L | L261202 | 05/07/2026 | 30/01/2027 | 144 | Active |
The first batch has already passed its deadline: the sheet marks it as Expired with negative days, and that is the moment to pull it and document it. The second one expires in twelve days, fewer than the thirty-day margin: it is marked as Expiring soon and must go out first, for example through a promotion, a customer order or internal consumption. The last two have plenty of margin and show as Active. The row of an expired batch is not deleted immediately: it stays recorded with the note of the removal, because that history is what protects you in an audit or against a claim.
How to use it step by step
You can have the template running in less than an hour. This is the recommended order:
- Download the file with the button on this page and open it in Excel, on your computer or in the mobile or web version of Office.
- Read the Instructions sheet: it explains each column, each status and the golden rule of never selling or using expired products.
- Set the notice margin in the “notify (days in advance)” cell. If you leave it as is, it stays at thirty days, which is a good starting point.
- Record the batches you have today: one row per batch, with product, code, unit, quantity, dates and location. If two containers arrived in different purchases, they are two rows.
- Let the sheet do the work: the days remaining and the status of each row calculate themselves. Use the filters to review by status or by location.
- Schedule a ten-minute weekly review: sort by status, pull the Expired ones, move the Expiring soon ones to the front and update quantities after every exit.
The habit that pays the most is recording the exit on the same day: when you sell or use units of a batch, subtract that quantity in the corresponding row. That way the sheet always reflects what is really on the shelf, and the expiry alert never lands on a batch that no longer exists.
Where to apply this control
Any business that handles products with an expiry date or a shelf life can use this template. Some common examples:
| Type of product | What you record |
|---|---|
| Food | Meat, dairy, bakery, groceries, sauces and preserves; you watch the date on the packaging and the rotation on the shelf and in cold storage. |
| Beverages | Juices, dairy drinks, craft beers, flavored waters and fermented drinks, which have batches with short expiries. |
| Medicines and pharmacy | Pharmaceutical products, vitamins and supplements; here the control is also a health requirement. |
| Cosmetics and personal care | Creams, sunscreens, makeup and hair products, which lose stability after their date. |
| Cleaning supplies | Detergents, disinfectants and chemical products for professional or home use that carry a batch and a date. |
| Spare parts and materials with a shelf life | Filters, batteries, adhesives, paints and reagents that expire even though they are not food. |
In every case the logic is the same: record the batch when you receive it, watch the days remaining and let the automatic status say when to act. What changes is the notice margin and how often you review the sheet.
Common mistakes
Most expiry controls that fail do not fail because of the template, but because of three habits worth avoiding from day one:
- Not assigning the batch on every exit. If you sell or use stock without noting which batch it came from, you lose the ability to know what is left on the shelf and which batch expires first. Record the batch on each sale or on internal use, even if it is just the quantity and the code.
- Not reviewing the sheet regularly. The thirty-day alert only works if someone opens the file and looks at the Status column. A ten-minute weekly review, sorting by status, is enough to keep any batch from expiring without you knowing.
- Mixing batches in a single row. Adding two different batches into the same row, with the same product but different dates, makes the control show only one date and hides the status of the oldest batch. If they arrived at different times, they are different rows, even for the same product.
Expiry control with software
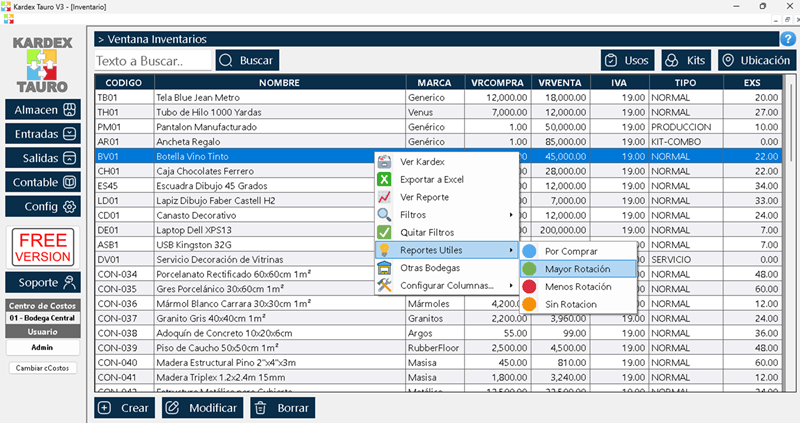
Excel is an excellent entry point to expiry control, but it has a natural limit: it depends on someone opening the file, updating quantities and keeping the discipline of the two hundred rows. When the business grows, several warehouses appear, more people record stock, and you need to know not only what expires, but which customers received each batch. At that point, a system such as Kardex Tauro takes the same control further: automatic expiry alerts that do not depend on opening a sheet, batch traceability to know which orders or customers received each code, and a record of removals and returns with their justification. Honesty matters here too: no tool pulls the expired product for you; the decision to separate and document the batch is always the team's.
Start with what you have: download the template, record the batches that are in your warehouse or store today, and check this week how the automatic status warns you before it is too late. And when the volume asks for more, evaluate Kardex Tauro for alerts and batch traceability at a larger scale. Controlling expiries does not have to be a source of anxiety: it can be a sheet that works on its own while you decide what to do with the information.
Frequently asked questions
What does a batch and expiry tracker record?
Each batch with its expiry date, the quantity on hand and the location. Without the batch you cannot withdraw only what has expired.
What is it for?
To sell first what expires first, and not to discover expired stock during the count, when it is already a loss.
How is the alert handled?
With a days-remaining column and a filter. What is about to expire is brought into view and decided: rotate, promote or write off.
Important note: when a batch shows as Expired, remove it immediately from the sales or use area, separate it from the rest and document the removal with date, quantity and final destination. Never sell or use an expired product, even if it is only one day past its date: the risk to your customers' health and to your business is not worth it.
⬇ Download the expiry and batch template for free (Excel .xlsx)