How to Assign a Storage Location to a Product, Step by Step
How to Assign a Storage Location to a Product, Step by Step
Without a recorded location, finding an item depends on whoever happens to remember where it was put. People walk the aisle, check the shelves one by one, and the pick either leaves late or leaves wrong. A bin / storage location turns that search into an exact instruction (B01, row 03, column 03, level 02) that any operator can follow without asking. On top of that, the location is stored per item and per cost center, so the same item can sit in a different place in each center.
This guide walks through the eight steps with one screenshot per screen, from «Inventory» to the final check. The example sets the location for item MAN-EN01 — Ergonomic Chair User Manual EN in cost center 01 - Bodega Central: «Warehouse» = B01, «Row» = 03, «Column» = 03 and «Level» = 02. The same steps work for any item in the inventory list and also for fixing a location that is already saved.
Before you start
- Permission to open the inventory module and use the «Location» option in the item list.
- The right cost center active: it shows at the bottom of the sidebar and is changed with «Change Cost Center», because the location is saved for that center.
- The item already created in the inventory: you assign the location from the item list, not while creating it.
- Your warehouse naming decided in advance: «Warehouse», «Row», «Column» and «Level» are free text fields.
Step by step
Step 1 — The main window
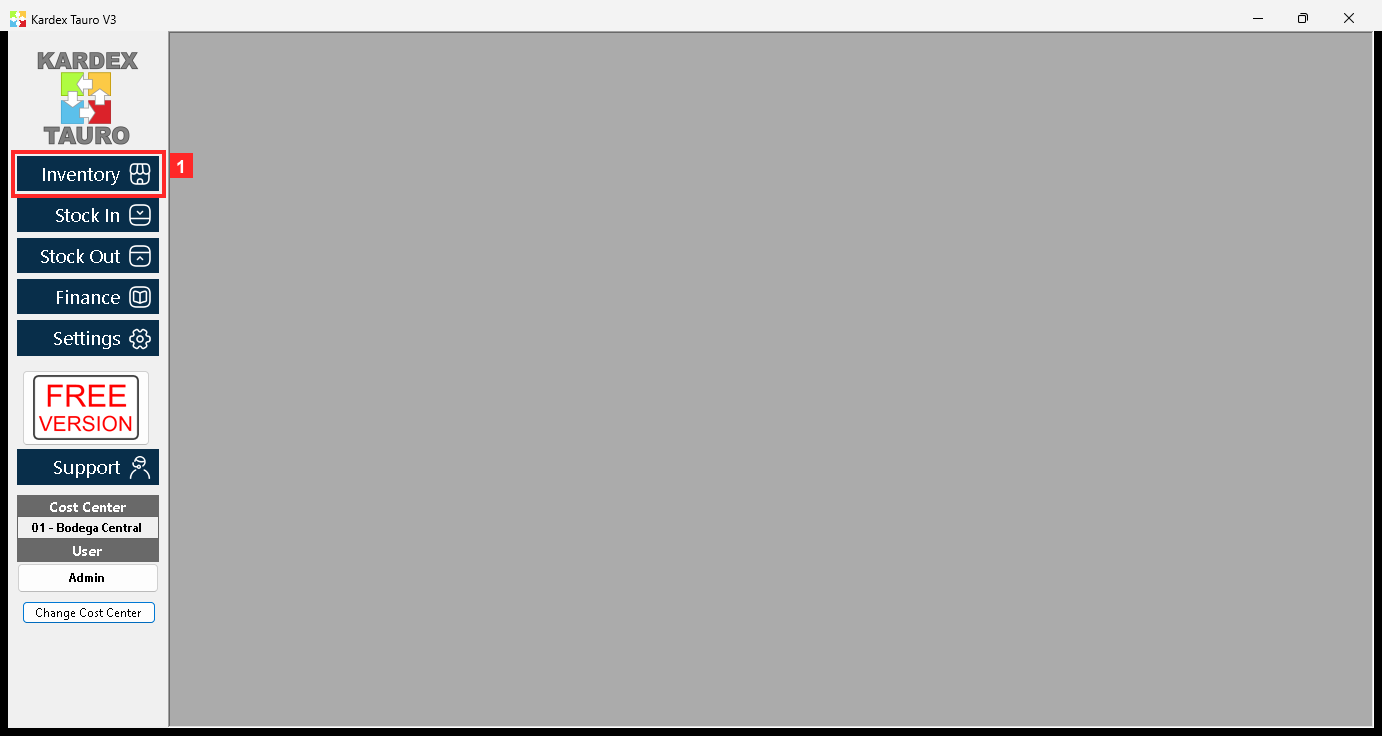
KardexTauro V3 opens in this window. The left sidebar groups the system modules and the central area is the working area. The lower part shows the active Cost Center (01 - Bodega Central), the logged-in User and the «Change Cost Center» button. The location is stored per product and cost center, so it applies to the active one.
Texts on screen: «Inventory», «Stock In», «Stock Out», «Change Cost Center»
Action: Press «Inventory» to enter the inventory module.
Step 2 — The inventory module menu
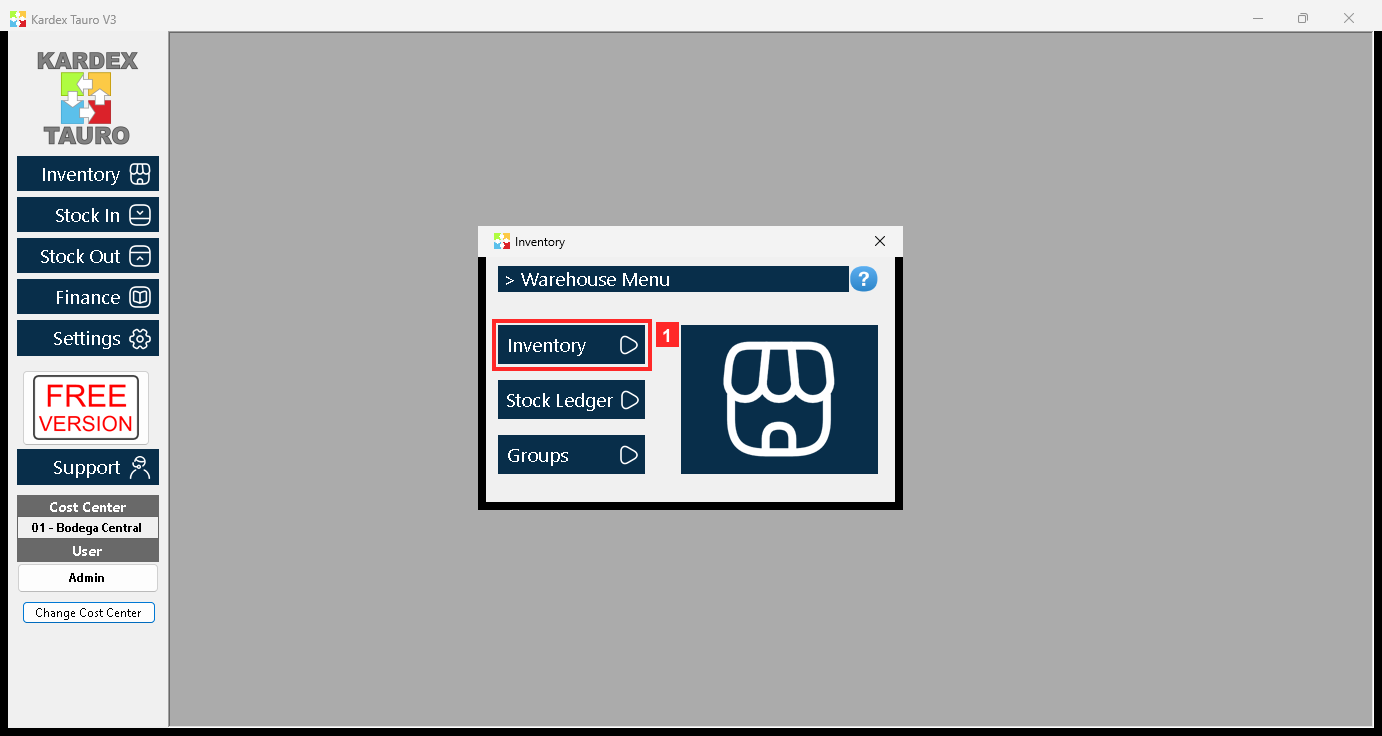
Pressing «Inventory» opens the module menu with «Inventory», «Stock Ledger» and «Groups». The location is set from the product list, so this guide uses «Inventory».
Texts on screen: «Inventory», «Stock Ledger», «Groups»
Action: Press «Inventory» to open the product list.
Step 3 — The product list: find the product
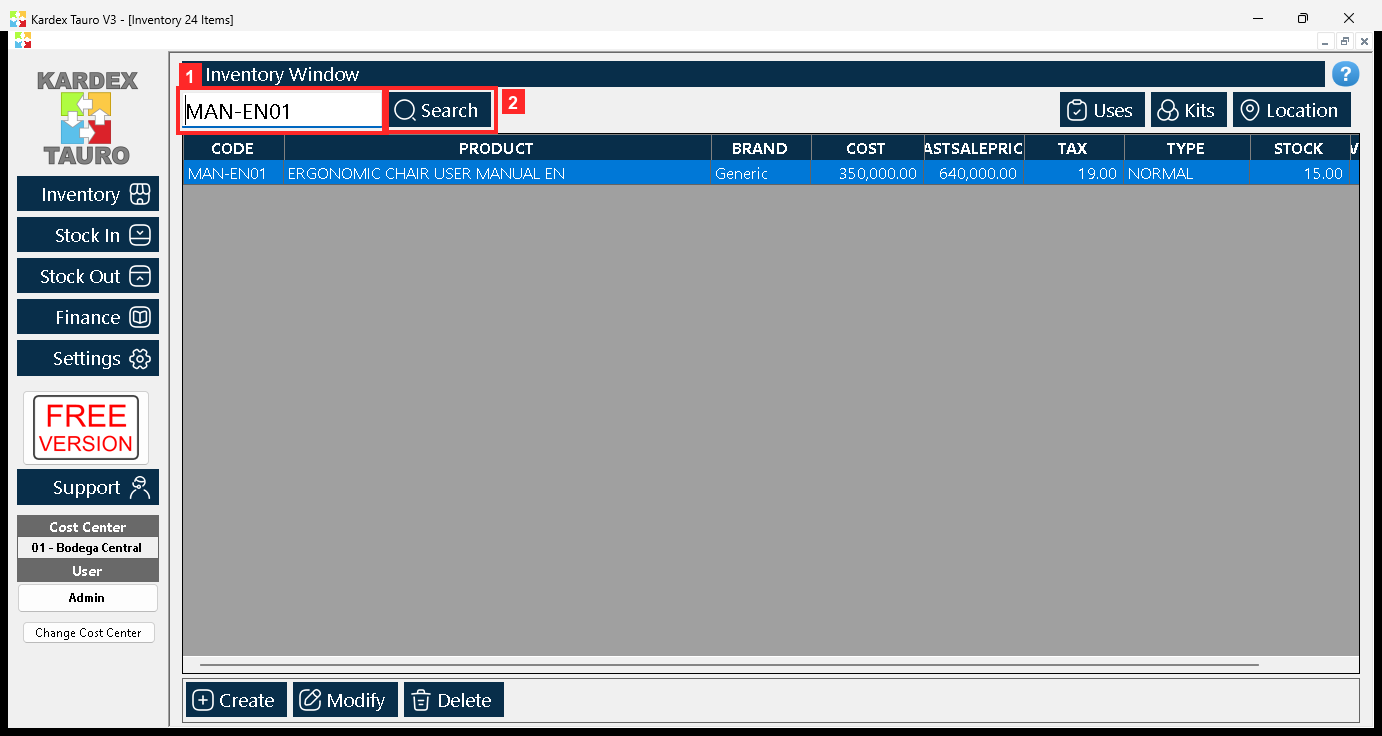
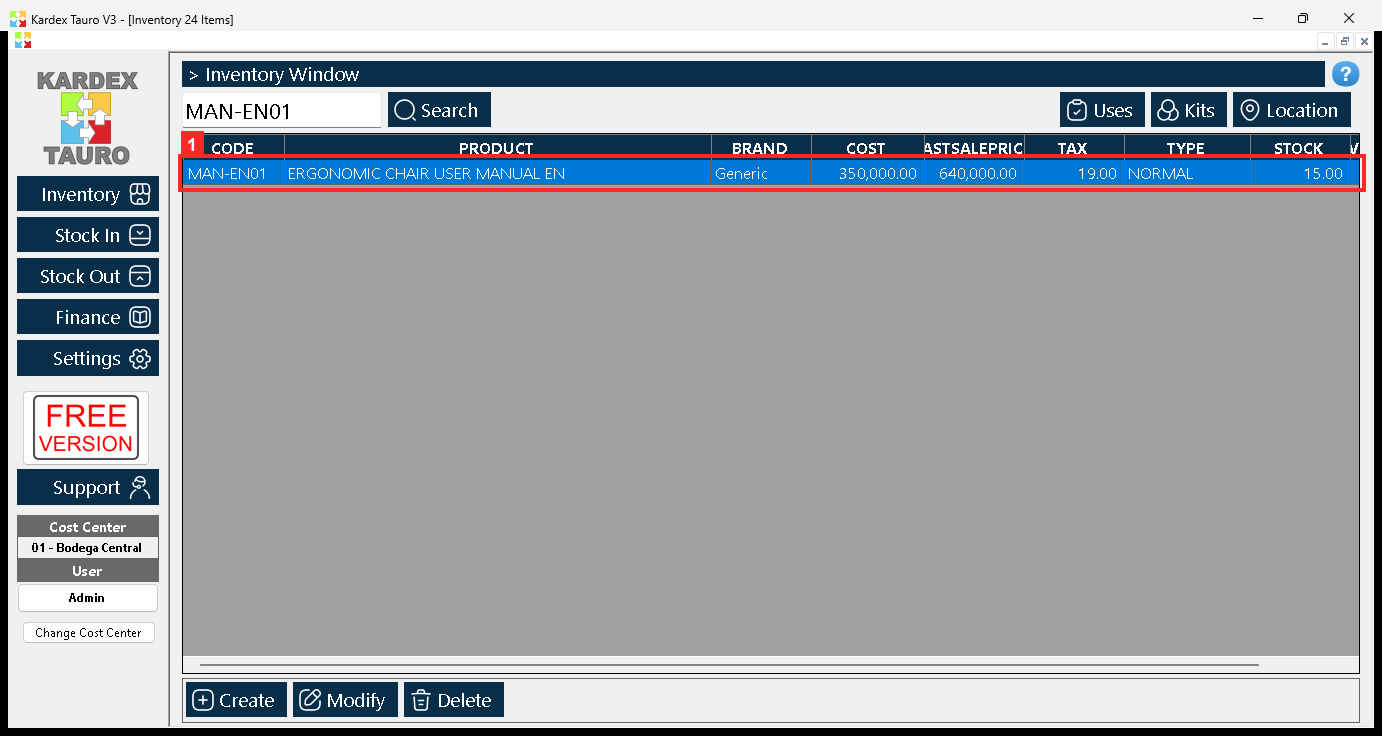
The «Inventory 24 Items» window opens inside the working area. Type the product code in the search box and press «Search»: the list is filtered down to that product.
Texts on screen: «Search», «Uses», «Kits»
Action: Type the code and press «Search».
Step 4 — Select the product and press «Location»
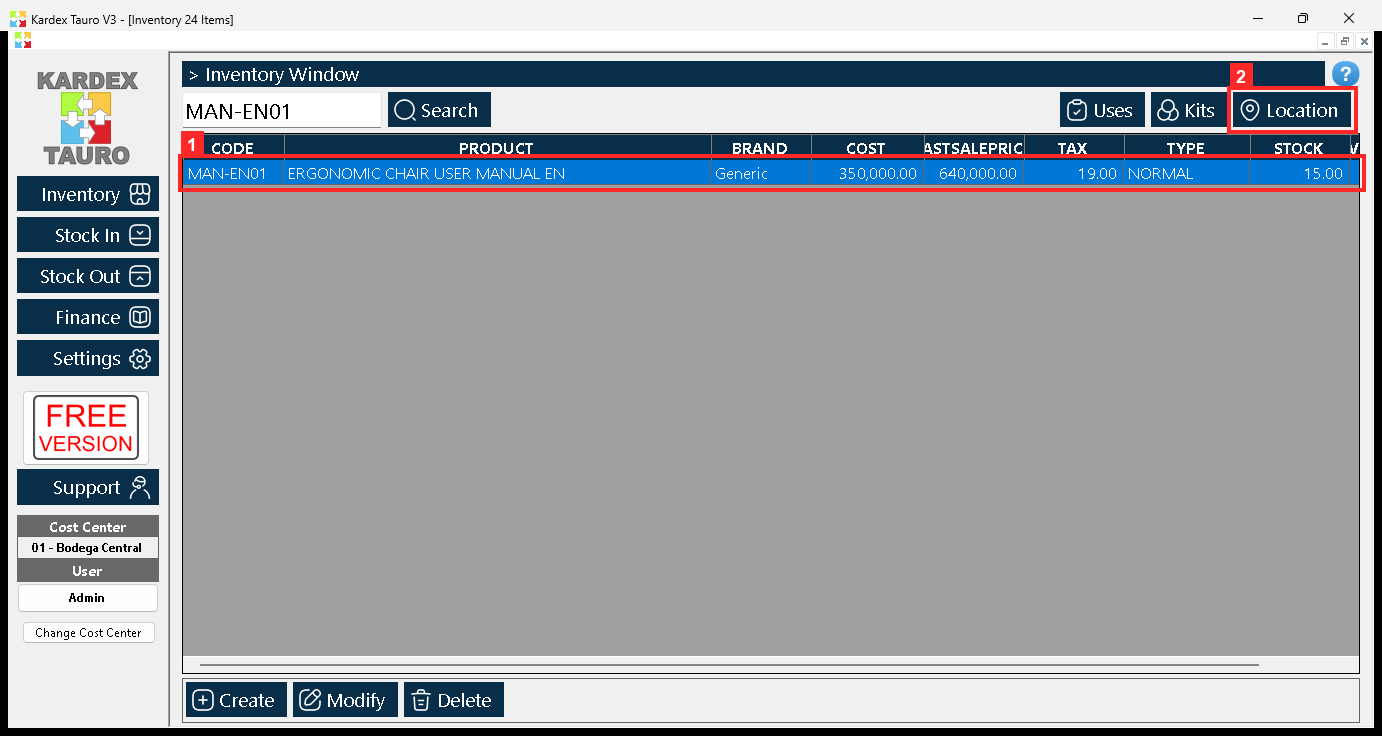
Select the row of the product: the actions in the bottom bar and the buttons at the top right («Uses», «Kits» and «Location») act on the selected product.
Texts on screen: «Location», «Uses», «Kits»
Action: Press «Location» to open the location window.
Step 5 — The «Location» window
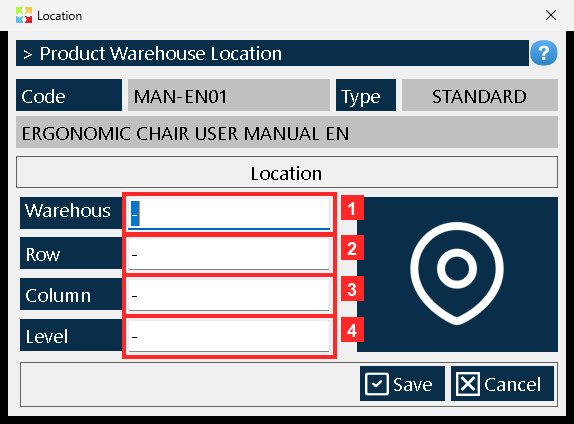
The «Location» window opens with the «Code» (MAN-EN01), the «Type» and the product name. Under «Location» you find the four location fields: «Warehouse», «Row», «Column» and «Level». They are free text fields: use whatever naming your warehouse uses.
In the image:
- 1) «Warehouse»: warehouse where the product is kept.
- 2) «Row»: row or shelf.
- 3) «Column»: column inside the row.
- 4) «Level»: level inside the column.
Texts on screen: «Location», «Cancel», «Save»
Action: Type the four values and press «Save».
Step 6 — The location data
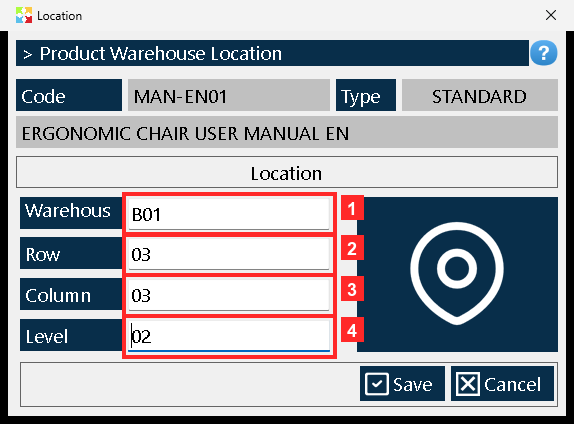
Example location: «Warehouse» = B01, «Row» = 03, «Column» = 03 and «Level» = 02.
In the image:
- 1) «Warehouse» = B01
- 2) «Row» = 03
- 3) «Column» = 03
- 4) «Level» = 02
Action: Check the four values and press «Save» to save.
Step 7 — Saving the location
Pressing «Save» stores the location of the product in cost center 01 - Bodega Central. If the product already had a location, it is replaced by the new one.
Action: The location is recorded for that product in the active cost center.
Step 8 — Checking the location
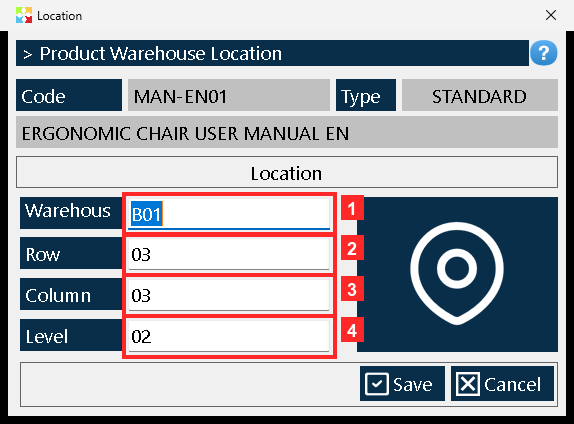
To check it, press «Location» again with the product selected: the window opens with the stored data («Warehouse» = B01, «Row» = 03, «Column» = 03 and «Level» = 02).
In the image:
- 1) «Warehouse» = B01 (stored)
- 2) «Row» = 03 (stored)
- 3) «Column» = 03 (stored)
- 4) «Level» = 02 (stored)
Texts on screen: «Save», «Cancel»
Action: The location can be changed whenever needed by repeating these same steps.
Result
The location is recorded for item «MAN-EN01» in cost center 01 - Bodega Central, and you check it by pressing «Location» again with the item selected: the window opens with the stored values («Warehouse» = B01, «Row» = 03, «Column» = 03 and «Level» = 02). The result was verified by reading the program's database (kardex.db), not just the screen.
Best practices
- Agree on the naming before you load the first location: the four fields are free text, and mixing formats (03, 3, F03) leaves the data inconsistent for whoever has to pick.
- Check the active cost center before you save: the location is stored per item and per center, so in another center you have to run the process again.
- Assign the location as soon as the item enters the inventory. Items with no location are the ones that later force people to walk the whole warehouse.
- After saving, open «Location» again to check the four values: it is the fastest way to confirm they came out the way you wanted, and that same route is how you update them when the item moves.
Frequently asked questions
Is the location saved per item or per warehouse?
It is saved per item and per cost center. In the example it ended up in 01 - Bodega Central; if the same item has to be located in another center, run these steps again with that center active.
What happens if the item already had a saved location?
When you press «Save», the new location replaces the previous one. That is why the same procedure is how you fix a wrong location or record that the item has moved.
Do «Warehouse», «Row», «Column» and «Level» have a required format?
No: they are free text fields, typed with whatever naming your warehouse uses. The example in this guide uses B01 for «Warehouse», 03 for «Row», 03 for «Column» and 02 for «Level».
This article is part of the Kardex Tauro V3 User Manual, which gathers every process in the system, explained step by step.
