How to Create a Payable, Step by Step
How to Create a Payable, Step by Step
Every debt to a supplier ends in a payment date. When payables live only in the buyer's head or in a notebook, the same purchase gets paid twice, an instalment slides past its due date, or someone disputes a balance nobody can prove. Keeping the accounts payable entry in the system gives every obligation a name, an amount and a date, and leaves the outstanding balance available at any time without relying on one person's memory.
This guide follows the whole process on the application, with one screenshot per screen and the meaning of every numbered red box. The example records account 01-CXP-24 for partner 001 — Default Supplier, with the description «SAMPLE PAYABLE ACCOUNT» and an obligation amount of 500000, inside cost center 01 - Bodega Central. The same eight steps work for any obligation you owe a supplier, whether it is a purchase of goods, a service or an unpaid invoice.
Before you start
- Access to the «Finance» module, where accounts payable accounts are handled: they are not under «Inventory».
- The right cost center active: it is shown at the top and is changed with «Change Cost Center».
- The code of the creditor partner, for example 001 — Default Supplier.
- The description and the obligation amount you need to record.
Step by step
Step 1 — The main window
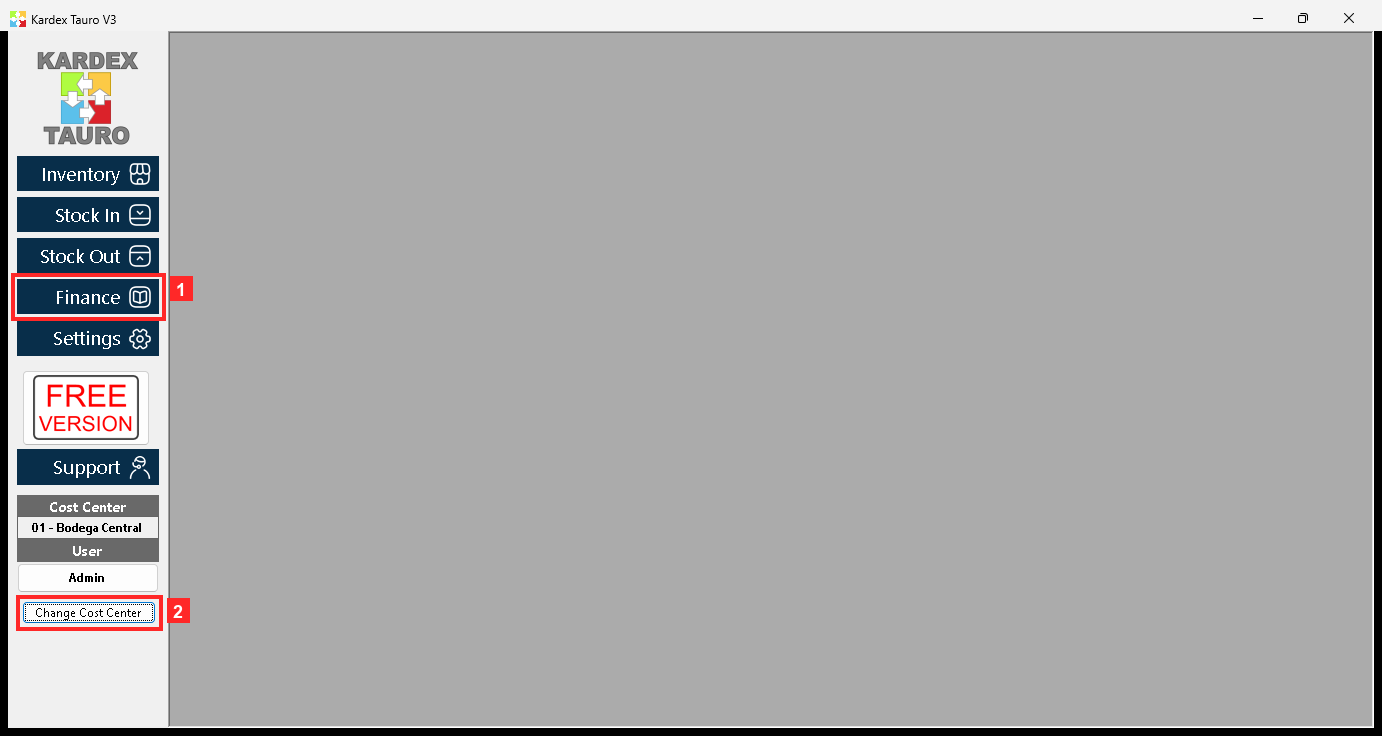
KardexTauro V3 opens in this window. The modules are on the left and the active cost center is at the top («Change Cost Center» changes it). This accounts payable account will be opened in cost center 01 - Bodega Central.
Texts on screen: «Finance», «Inventory», «Stock In», «Stock Out», «Change Cost Center»
Action: The side buttons open each module; accounts are handled in «Finance».
Step 2 — The finance menu
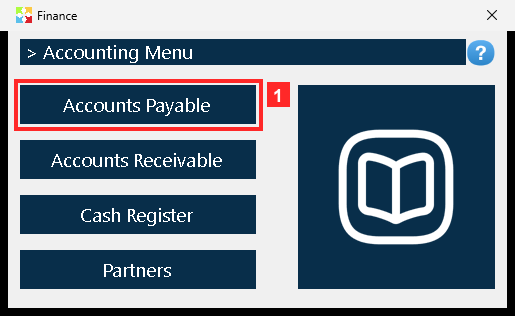
Pressing «Finance» opens the finance menu. «Accounts Payable» is the accounts payable accounts option; the other ledger is right next to it, so it is worth checking which one you press.
Action: Press «Accounts Payable» to open the accounts payable accounts list.
Step 3 — The accounts payable accounts list
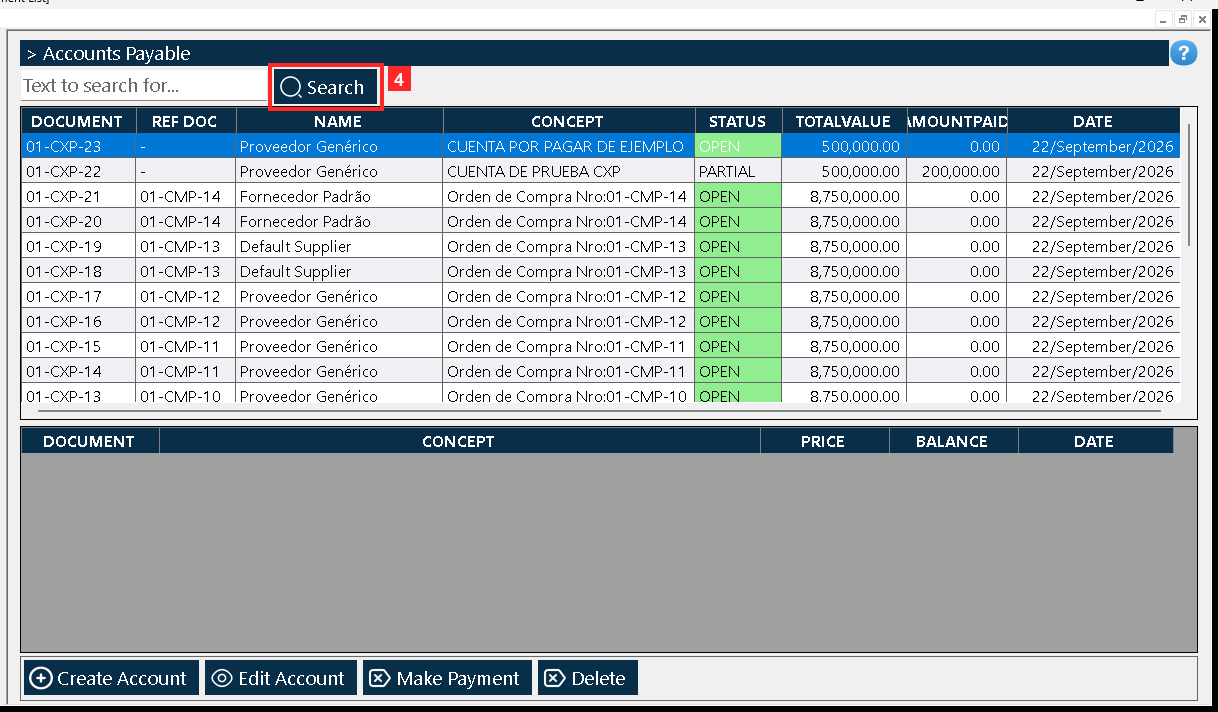
«Document List» opens. The master grid lists every account with its reference, the partner, the description, the STATUS (OPEN), the total, the amount paid and the date (01-CXP-23 | - | Proveedor Genérico | CUENTA POR PAGAR DE EJEMPLO | OPEN | 500,000.00 | 0.00 | 22/September/2026); below, the detail grid shows the movements of the selected account. The states are OPEN (no payments), PARTIAL (with payments) and CLOSED (fully paid).
Texts on screen: «Search»
Action: Press «Create Account» to create a new account.
Step 4 — The document: the partner
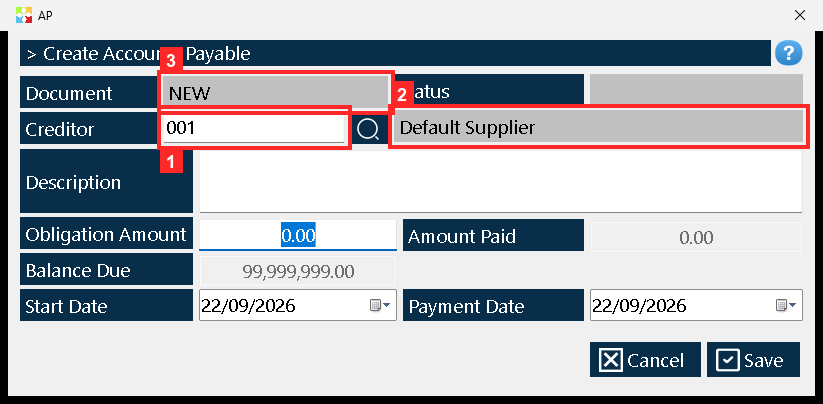
The document «AP» opens. «Creditor» is the partner of the account (001 — Default Supplier). At the top you can see «Document» («NEW»: it is assigned when saving) and «Status».
In the image:
- 1) «Creditor»: partner code (001).
- 3) «Document»: account number (NEW).
Texts on screen: «Creditor», «Document», «Status»
Action: Type the partner code in «Creditor» (or look it up with the magnifier).
Step 5 — The description and the amount due
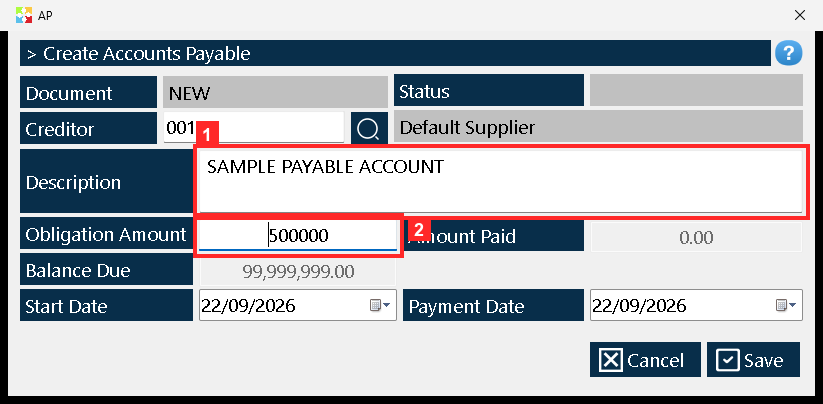
Below are «Description» (what the account is for) and «Obligation Amount», the amount owed. In this example: «SAMPLE PAYABLE ACCOUNT» for 500000. Note: the program uses the SAME field labels in both ledgers, so do not go by them; what makes this account a PAYABLE one is the partner in «Creditor» and the 01-CXP document number.
In the image:
- 1) «Description»: account description.
- 2) «Obligation Amount»: amount owed (500000).
Texts on screen: «Description», «Obligation Amount», «Amount Paid», «Balance Due»
Action: Type the description and the amount due.
Step 6 — The dates and the balance
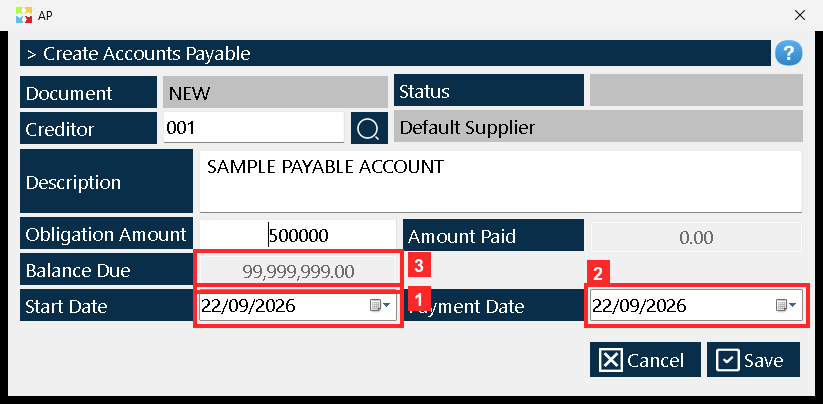
«Start Date» is the account date and «Payment Date» the expected payment date; the program proposes today for both (22/09/2026 and 22/09/2026). Next to them you see «Amount Paid» (0.00) —what has been paid, zero when the account is created— and «Balance Due», the outstanding balance, which is a calculated field: it appears greyed out because it is not typed by hand.
In the image:
- 1) «Start Date»: account date (22/09/2026).
- 2) «Payment Date»: payment date (22/09/2026).
- 3) «Balance Due»: outstanding balance (99,999,999.00).
Texts on screen: «Start Date», «Payment Date», «Amount Paid», «Balance Due»
Action: Check the dates: each one can be changed with its drop-down.
Step 7 — Saving the account
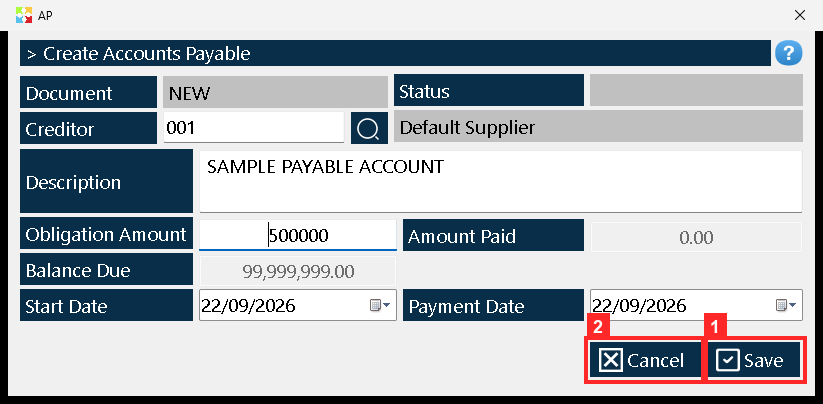
The document is saved with «Save». Unlike the warehouse documents, there is no finish dialog here: when you save, the account is registered and the document closes by itself.
Texts on screen: «Save», «Cancel»
Action: Press «Save» to save the account.
Step 8 — The account created
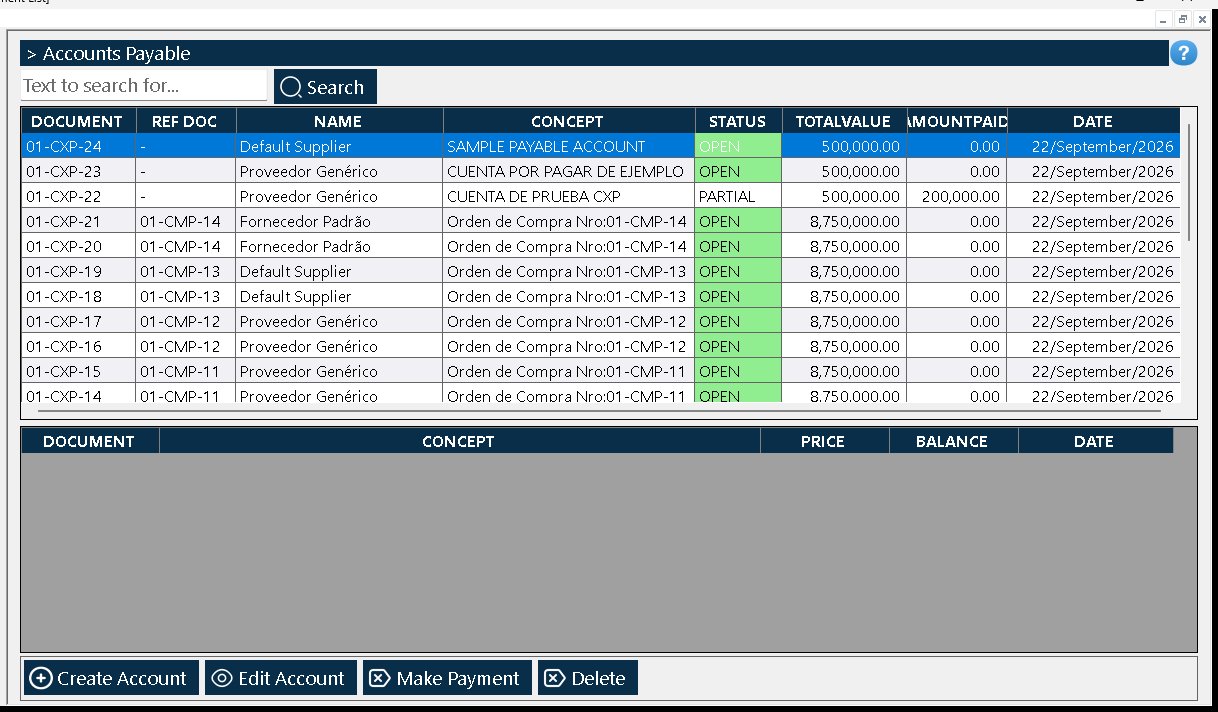
Once saved, the account appears in the list as «01-CXP-24» with status OPEN, the total 500000.0 and no payments yet (0.0). From here you can open it with «Edit Account» or register a payment with «Make Payment».
Action: Check the new account in the list; to pay it, see the payment guide.
Result
The account was saved and shows up in the list as 01-CXP-24 with status OPEN, a total of 500000.0 and no payments against it yet (0.0). From the list you can open it with «Edit Account» or register a payment with «Make Payment». The result was verified by reading the program's database, not just the screen.
Best practices
- Record the account the same day the obligation arises, not at the end of the month: «Start Date» is the account date and it is what stays in the history.
- Always check «Payment Date»: the program proposes today's date, and if payment was agreed for another day you have to change it with the drop-down.
- Check which option you press in the «Finance» menu: the other ledger sits right next to it and both use the same field names.
- Write a description that identifies the obligation (invoice or service and period), because the list only shows one description column.
Frequently asked questions
What makes an accounts payable account different from the other ledger if the fields have the same names?
What defines it is the partner in «Creditor» (the creditor) and the 01-CXP document number. The labels «Obligation Amount», «Amount Paid», «Balance Due» and «Payment Date» are the same in both ledgers, so it is worth checking which option you press in the menu.
What do the account statuses mean?
A new account is OPEN, with no payments against it; once part of it is paid it becomes PARTIAL, and when it is paid in full, CLOSED. The status shows in the STATUS column of the list.
Do I type the document number myself?
No. The «Document» field shows NEW when you open the AP document and the program assigns the number when you save (in the example, 01-CXP-24). There is no finish dialog here: pressing «Save» registers the account and the document closes by itself.
This article is part of the Kardex Tauro V3 User Manual, which gathers every process in the system, explained step by step.
