Warranty and serial number tracking template in Excel

Warranty and serial number tracking template in Excel
When a business sells products under warranty, the same question always shows up sooner or later: is this unit still covered? Until when? Answering it requires two pieces of information that are almost never recorded in order: what warranty was given with each product sold, and which serial number left the store with that unit. When that information lives only in a salesperson's memory, in loose receipts or in a notebook, every claim turns into an investigation: digging through papers, guessing dates, asking who handled that sale. And when the customer brings the unit in, the last thing they want to hear is that the store does not know whether the warranty is still valid.
The problem is not the warranty itself but the lack of an organized record behind it. In a technology, appliance or spare parts business, every unit sold has its own serial number and a sale date that defines when its coverage starts. With that basis, the expiration date can always be calculated: sale date plus the agreed warranty months. What is missing is a single place where that data stays together, complete and at hand whenever a customer calls or shows up at the counter.
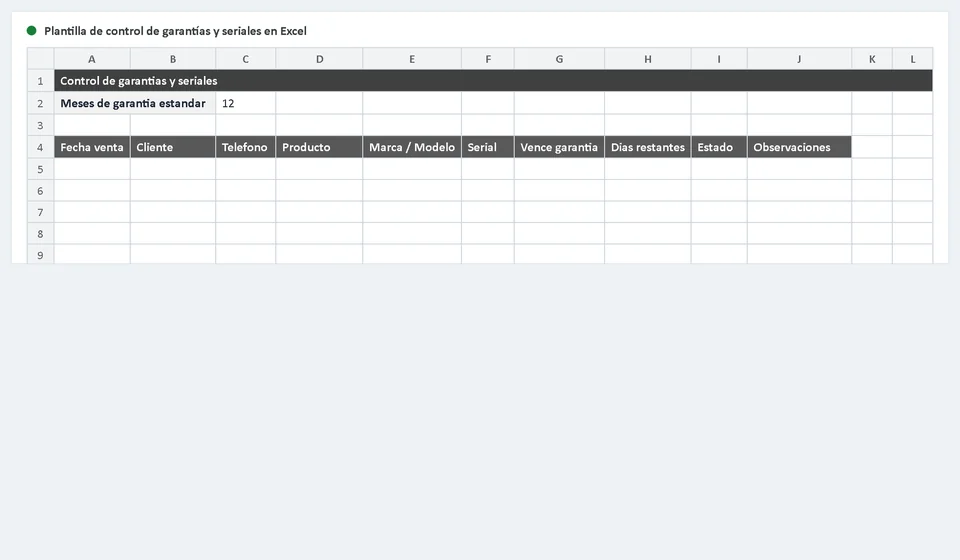
So you can solve it without complications, we prepared a warranty and serial number tracking template in Excel, free and ready to download. The file includes the log where you enter each sale with its serial number, the formulas that calculate the warranty expiration and the days remaining, a sheet to configure warranty months by product type, and a complete example so you can see how it is filled in. Download it with the button below and open it while you read the rest of the article:
⬇ Download warranty and serial number tracking template in Excel (.xlsx)What a warranty and serial number tracking template is for
It lets the business know, at any time, what warranty each unit it sold has and how to identify that unit. It is an internal control: it is not an invoice or any kind of tax document; it is the commercial log that links each sale to a serial number, a customer and a coverage period. It is especially useful in three kinds of businesses. Technology resellers: laptops, phones, tablets and accessories, where two identical units can have different warranties depending on when they were sold. Appliance stores: washing machines, refrigerators, microwaves and other equipment, which usually come back for warranty service months after the purchase. And businesses that sell spare parts or components: motors, batteries, parts, where the serial number of the unit is the only reliable way to know which exact piece it is.
With the log filled in, handling a warranty case takes minutes: the customer says the serial number or shows the receipt, the row is found, the expiration and the days remaining are checked, and you immediately know whether the unit is covered, whether the coverage already expired or whether it is about to expire. Without a log, that same answer can take days and ends up depending on somebody's memory.
An organized record also helps you make better business decisions: you can see which brands or models come back under warranty more often, how many cases are handled each month and which failures repeat. That information, which today gets lost in casual conversations, stays documented and lets you negotiate better with suppliers or adjust the store's warranty policy when needed.
What the template includes
The template is organized in blocks so it fills out fast and reads at a glance. This is what you will find inside:
| Block | What it contains | What it is for |
|---|---|---|
| Sale details | Sale date, customer, product and brand or model | Identify what was sold, to whom and when |
| Unit serial number | The serial number printed on the unit, exactly as it appears on its label | Tell units apart even when they are the same model |
| Warranty | Warranty months, calculated expiration, days remaining and status | Know whether the unit is covered and until what date |
| Settings and instructions | A sheet where you set the warranty months for each product type plus a filling guide | Adjust the calculation to each business and answer questions |
The columns of the log
Each row of the log is one unit sold. These are the columns and what goes in each one:
| Column | What to write |
|---|---|
| Sale date | The day the unit left the store, in day/month/year format |
| Customer | The customer's name or an identifier when the sale was cash with no data recorded |
| Product | What was sold: laptop, washing machine, motor or other equipment |
| Brand / model | The exact brand and model of the unit sold |
| Serial number | The serial number copied from the unit's label, without mistakes |
| Warranty expiration | Calculated automatically: the sale date plus the configured warranty months |
| Days remaining | Calculated automatically: how many days are left until the warranty expires |
| Status | Warranty situation: active, in process, expired or closed |
One important detail: each row holds a single unit. If a customer buys three identical units, you enter three rows, one per serial number, because each serial has its own sale date and its own warranty. That rule avoids the most common confusion: mixing the coverage of one unit with the coverage of another that looks exactly the same but left the store on a different date.
A practical example: a laptop with a 12-month warranty
Imagine that on 01/03/2027 (1 March 2027) you sell a laptop with a 12-month warranty and record its serial number at the moment of the sale. The row in the log looks like this (brand and customer data are illustrative):
| Field | Example |
|---|---|
| Sale date | 01/03/2027 |
| Customer | Customer A |
| Product | Laptop |
| Brand / model | Generic brand / Model L-14 |
| Serial number | ABC123 |
| Warranty months | 12 |
| Warranty expiration | 01/03/2028 |
| Days remaining | Calculated automatically |
| Status | Active |
The expiration date is not typed by hand: the template calculates it by adding the 12 months to the sale date, so 01/03/2027 plus 12 months gives exactly 01/03/2028 (1 March 2028). The days remaining column does the rest: while the number is positive the warranty is active, and when it reaches zero the warranty has expired. With that single row you can already answer the customer's question without checking any paper.
How to use the template step by step
Follow these steps and the control will be working by the end of the first week:
- Set the warranty lengths. Before entering sales, write the warranty months for each product type in the settings sheet: for example, 12 months for laptops, 24 for large appliances, or whatever period your business offers.
- Log every sale with its serial number. When a unit goes out, create a new row with the date, customer, product, brand or model, and the serial number copied from the label. Record the serial number at the moment of the sale, not later.
- Let the expiration calculate itself. Do not type expiration dates by hand: that column already adds the configured months to the sale date.
- Check the days remaining. Sort or filter by that column to see which warranties expire soon and which ones have already expired.
- Update the status when a case arrives. If the customer brings the unit in for a warranty issue, change the status to "in process"; once the case is resolved, set it to "closed" or to the final status your business uses.
- Review the log regularly. Spend a few minutes each week looking at upcoming expirations and keep a backup copy of the file.
Tips to make the control actually work
- Record the serial number at the moment of the sale. It is the only time you have the unit in front of you with the label visible; once it leaves the store, identifying it becomes hard and depends on what the salesperson remembers.
- Set the warranty months correctly for each product type. If the length is wrong, the calculated expiration will be wrong too, and the whole control loses its purpose.
- Update the status as soon as you receive the case. The moment the customer arrives with the unit, switch the warranty to "in process"; that keeps an open case from being forgotten in the middle of the log.
- Reach out before the warranty expires. The days remaining column lets you call or write to the customer when coverage is about to end and offer a check-up or an extension if your business provides one.
When to move from the template to warranty software
The template works very well when sales are few and one or two people handle them. But when volume grows, when several salespeople serve the counter, when you need to see at a glance how many warranties are in process, which ones expired this month or which serial numbers are waiting to be replaced, keeping the log in Excel starts demanding time the business no longer has.
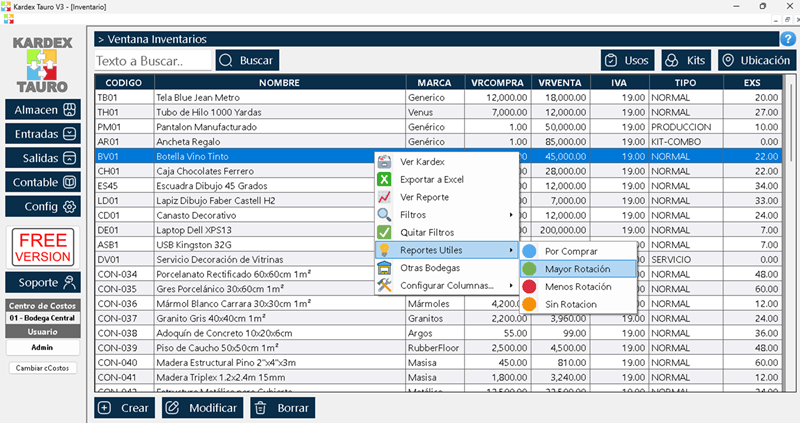
That is the moment to rely on a system like Kardex Tauro, where every sale is linked to the customer and the product from the start. With Kardex Tauro, the thread between what enters inventory, what is sold and what comes back under warranty is never lost: the serial number of each unit and its history stay in one place, ready to consult when the customer shows up at the counter.
Frequently asked questions
What does a warranty and serial log record?
Each unit with its serial number, sale date, customer and warranty expiry.
What is it for?
To know whether a claim is under warranty and to trace a defective batch back to the customers who bought it.
How do you look it up quickly?
By serial number or by customer. That is why those two fields must be mandatory.
In the meantime, start with the simplest and most effective control: download the template, record the serial number of every unit when you sell it, and check expirations every week. You will notice the difference the first time you handle a warranty case without digging through papers.
⬇ Download warranty and serial number tracking template in Excel (.xlsx)